Your Toyota Camry heater is meant to give you some peace of mind in the freezing cold, but if it is not working then there is definitely something wrong somewhere. There are a lot of things that could go wrong, which means you would have to spend a lot of time trying to find the component that went bad before thinking of fixing it.
Before we jump right into the causes of car heater problems and their fixes, you should know just how your car heater work.

If you don’t know, your vehicle’s heating system is actually part of its cooling system. The heat that is dissipated into the cabin actually comes from your car’s engine. The cooling system circulates a coolant through the engine which absorbs the heat.
The heated coolant then runs through the radiator and then through the heater core and into the car when you turn on the heat. You can control the amount of heat entering the cabin and the direction it blows using the HVAC controls on your dash. This directs the heater’s valves and the blower fan.
If you’re experiencing problems with your car’s heater system, then it’s most likely that one of the heating processes had failed.
Toyota Camry Heater Not Working: Common Causes
- Low level of coolant
- Defective thermostat
- Presence of airlock
- Bad coolant hoses or loose clamps
- Radiator leak
- Faulty water pump
- Faulty thermostat switch
- Clogged heater core internal passages
- Clogged heater core exterior
- Faulty heater valves
- Faulty wiring or a blown fuse
Toyota Camry Heater Not Working: How to Fix
Check the Coolant Level
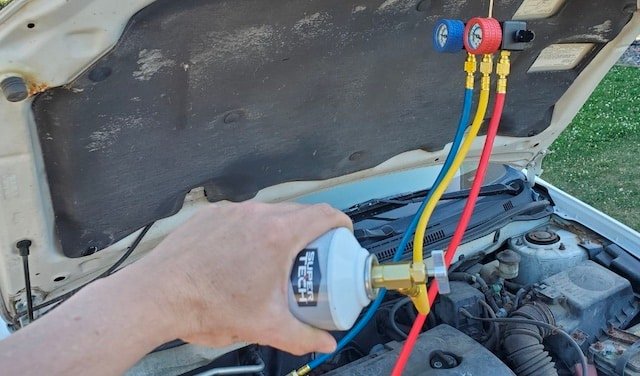
Low coolant level is one of the most common problems with vehicle heating systems and it is also quite easy to fix. If the coolant level is too low, the heater core won’t be getting enough warmed coolant which it needs to produce enough heat. To solve this, you would simply need to top the coolant.
In some cases, this might not work which could be due to the fact that there is a leak somewhere. A coolant leak could be due to a cracked hose or loose clamp, however, it could also be a more serious problem like a head gasket leak. Whichever one is at fault, you shouldn’t hesitate to get it fixed. Without adequate coolant, your vehicle’s engine would overheat and get damaged.
Check the Thermostat
The thermostat in your cooling system acts as a valve that would stay closed when the engine is cold thereby creating a shorter coolant circulation path. This would make your engine warm up more quickly thereby reducing emissions.
A working thermostat would stay open as your engine reaches operating temperature but a defective one would remain stuck in an open position thereby delaying warm-up and obstructing heat production.
A faulty thermostat would cause more problems for your vehicle. It could make your temperature gauge read lower than normal and also, turn your check engine light on.
Fixing a faulty thermostat shouldn’t be much of a hassle. You won’t have to get your mechanic on the job but if you go for a mechanic, they would test the thermostat and replace it if necessary.
If you prefer doing it yourself, then you can remove the thermostat and test it by boiling it in water to see if it closes. This process also involves draining your coolant which could be tricky for the average car owner. For the best results, you might want to leave this one to your mechanic.
Clear Out Air Locks
An airlock refers to a large air bubble that could form in the cooling system as a result of a recent coolant top-up or a coolant leak. In other words, an airlock could result when you try to top-up coolant to solve the heating problem. The airlock will prevent the coolant from circulating properly which will hinder heat production.
If you’ve tried to solve the heating problem by topping coolant and it doesn’t work, then you should look out for and clear any airlocks that would pose a problem.
To clear out an airlock, you would have to
- Set the heater to its max setting
- Remove the coolant tank cap and then fill the coolant to the proper level
- Start the engine with the cap still open and let it idle for a few minutes
- If the coolant level drops as the thermostat opens, top it again to the necessary level.
- This should clear off any air bubbles.
- Wait till the engine is fully warmed then put the cap back on.
- Take the car for a test drive to see if the heat output is back to normal.
Other Fixes to Try Out
- Check for Faulty Coolant Hoses or Loose Clamps – Coolant hoses could deteriorate and the clamps could come loose. Inspect these areas and make the necessary corrections.
- Check for Radiator Leak – A radiator leak could lead to more serious problems if left unchecked. It should be fixed or have the radiator replaced.
- Bad Radiator Cap – Replace the radiator cap if faulty
- Check the Water Pump – The water pump would have to be fixed or replaced
- Fix the Thermostat Switch – The thermostat switch may have to be replaced.
- Flush the Heater Core’s Passages – If the heater core’s passages are clogged, then you should get your mechanic to flush them or replace the heater core
- Clean the Heat-Radiating Fins of the Heater Core – The fins could become clogged with debris. You should be able to clean them yourself.
- Faulty Heater Valves – The heater valves could be faulty and would have to be fixed or replaced
- Check the Blower For Issues – The blower fan could not be working due to a blown fuse, faulty wiring, or it would have to be replaced.